Guide
How to Make Homemade Baby Purees (10 Easy Recipes)
By Dr. Emma Wilson, Registered Dietitian · Updated 2026-03-23

Making homemade baby purees is simpler than most parents expect — and it gives you full control over ingredients, texture, and freshness. With basic kitchen equipment and about 20 minutes of hands-on time, you can prepare a week's worth of nutrient-dense purees that cost a fraction of store-bought pouches and contain zero additives, thickeners, or added sugars.
By Dr. Emma Wilson, Registered Dietitian | Published: March 23, 2026
This article contains affiliate links. If you purchase through our links, we may earn a small commission at no extra cost to you. See our full affiliate disclosure for details.
Medical disclaimer: This article is for informational purposes only and does not replace individualised advice from your paediatrician, GP, or registered dietitian. Always consult a qualified health professional before starting solids or making changes to your baby's diet.
Table of Contents
- Why Make Homemade Baby Purees?
- What You Need to Get Started
- Best Baby Food Makers and Blenders for Purees
- How to Make Baby Purees: Step-by-Step
- 10 Easy Homemade Baby Puree Recipes
- Puree Stages: Textures by Age
- How to Store and Freeze Homemade Baby Purees
- Safety Tips for Homemade Baby Food
- Introducing Allergens Through Purees
- FAQs
- Sources
Why Make Homemade Baby Purees?
The baby food aisle is stacked with colorful pouches and glass jars promising organic, wholesome nutrition. Many of those products are perfectly fine. But making purees at home offers advantages that no commercial product can match.

Cost savings that add up fast
A single 4-ounce pouch of organic baby food costs between $1.50 and $3.00. Your baby will eat two to three servings of solid food per day by 8 months. That adds up to $90–$270 per month on pouches alone. A batch of homemade sweet potato puree — roughly eight 4-ounce servings — costs about $1.50 total. Over the six to eight months your baby eats purees, homemade feeding saves most families $500–$1,500.
Full control over ingredients and texture
When you make purees at home, you know exactly what goes in. No citric acid. No ascorbic acid added as a preservative. No thickeners like corn starch or tapioca. You also control the texture precisely, which matters as your baby progresses from silky-smooth first purees to chunkier, mashed textures that build oral motor skills.
Better flavor variety and palate development
Research published in the Journal of the Academy of Nutrition and Dietetics (2024) found that babies exposed to a wider variety of flavors and textures during the complementary feeding period showed greater food acceptance at 18 months. Store-bought options, while expanding in variety, still cannot match the range you can offer at home — think roasted beet and dill, steamed zucchini with basil, or poached pear with cinnamon.
Nutrient retention
Homemade purees prepared with steaming (rather than boiling) and served fresh or frozen immediately retain more heat-sensitive vitamins like vitamin C and folate. Commercial baby food undergoes high-heat pasteurization for shelf stability, which reduces some nutrient levels. A 2023 study in Food Chemistry showed steamed-and-pureed carrots retained 28% more beta-carotene than their commercial jarred equivalents.
If you're exploring different approaches to starting solids, our guide on baby-led weaning vs purees breaks down the evidence for each method — many families successfully combine both.
What You Need to Get Started
You don't need a kitchen full of specialty equipment. Most parents already own everything required to make excellent baby purees.

Essential equipment
- A way to cook: A steamer basket that fits inside a regular saucepan is the gold standard. Steaming preserves more nutrients than boiling because the food doesn't sit in water. A microwave steamer or an Instant Pot with a steamer rack also works well.
- A way to blend: Any blender, food processor, or immersion blender will produce smooth purees. For small batches, even a fork or potato masher handles soft-cooked fruits and vegetables.
- Storage containers: Silicone ice cube trays with lids are ideal for freezing individual portions. BPA-free storage containers or small glass jars work for refrigerator storage.
- Fine mesh strainer: Useful for removing seeds, skins, and fibers to achieve a smoother texture for younger babies.
Nice-to-have extras
- Silicone freezer storage bags (reusable)
- A dedicated baby food maker that steams and blends in one unit
- Small silicone spatulas for scraping every last bit from the blender
- Labels and a marker for dating frozen portions
- A food mill for larger batches of potatoes, peas, or beans
Fresh vs. frozen produce
Both work beautifully. Frozen fruits and vegetables are flash-frozen within hours of harvest, locking in nutrients at their peak. Studies from the University of California, Davis found that frozen produce matched or exceeded the vitamin content of fresh produce that had been stored for five or more days. Use whichever is more convenient — or a mix of both.
Best Baby Food Makers and Blenders for Purees
While you can make purees with equipment you already own, a dedicated baby food maker or a quality blender simplifies the process — especially during those sleep-deprived early months. Here are our top picks for 2026, based on hands-on testing across multiple texture stages.
For our complete in-depth reviews and testing methodology, see our full guide to the best baby food makers and blenders.
BEABA Babycook Neo — Best Overall
Type: Steamer-Blender | Capacity: 5.2 cups | Rating: 9.5/10
The Babycook Neo steams, blends, defrosts, and reheats in a single stainless-steel and glass unit. One-handed operation is a genuine lifesaver when you're holding a baby. The patented steam-pulse system uses cooking liquid to thin purees, preserving water-soluble nutrients that would otherwise go down the drain.
Pros: Glass bowl, stainless-steel steam basket, quiet motor, auto-blend after steaming Cons: Higher price point, capacity limits batch prep
NutriBullet Baby Complete — Best Budget
Type: Bullet Blender System | Capacity: 3.5 cups | Rating: 8.8/10
This system comes with blending cups, storage containers, and a recipe book. It doesn't steam, but the powerful 200-watt motor produces consistently smooth purees from pre-cooked ingredients in under 30 seconds. The small footprint and dishwasher-safe parts make cleanup effortless.
Pros: Affordable, dishwasher safe, complete storage set included, compact Cons: No steaming function, small batch size
Baby Brezza One Step Deluxe — Best All-in-One
Type: Steamer-Blender | Capacity: 4 cups | Rating: 9.0/10
True one-button operation: add raw ingredients, press the button, and the Brezza steams and then blends automatically. The large water reservoir handles multiple steam cycles without refilling, and the nozzle design creates even steaming across different food types.
Pros: Fully automated, even steaming, easy to clean, reasonable price Cons: Plastic construction, slightly louder than BEABA
Vitamix E310 Explorian — Best Long-Term Investment
Type: Full-Size Blender | Capacity: 48 oz | Rating: 9.2/10
Not a dedicated baby food maker, but the Vitamix produces the silkiest purees of any machine we tested — and you'll use it for smoothies, soups, and sauces for years to come. The variable speed dial gives you precise texture control from completely smooth to rustic and chunky.
Pros: Unmatched puree quality, variable speed, 7-year warranty, grows with family Cons: No steaming, large footprint, highest price
Braun MultiQuick 7 — Best Immersion Blender
Type: Immersion Blender | Capacity: Any pot | Rating: 8.5/10
Blend directly in the saucepan you cooked in — no transferring hot food. The ActiveBlade technology adjusts blade movement based on food resistance, and the one-click attachment system makes switching between the blending shaft and whisk accessories instant.
Pros: Blend in any pot, easy cleanup, versatile attachments, compact storage Cons: Requires separate cooking, harder to get perfectly smooth results for stage one
How to Make Baby Purees: Step-by-Step
The basic process is the same regardless of what equipment you use. Once you've made two or three batches, the whole routine takes under 20 minutes of active work.
Step 1: Choose and prep your produce
Wash all fruits and vegetables thoroughly. Peel anything with a tough skin (sweet potatoes, apples, pears, butternut squash). Remove seeds, pits, and stems. Cut into roughly equal-sized pieces — about 1-inch cubes — so everything cooks evenly.
Step 2: Cook until very tender
Steaming (preferred): Place prepared produce in a steamer basket over boiling water. Cover and steam until a fork slides through the food with no resistance. Timing varies:
| Produce | Steam Time |
|---|---|
| Peas | 3–4 minutes |
| Zucchini | 5–7 minutes |
| Broccoli | 6–8 minutes |
| Carrots | 10–12 minutes |
| Sweet potato | 12–15 minutes |
| Butternut squash | 12–15 minutes |
| Apples | 8–10 minutes |
| Pears | 6–8 minutes |
Roasting (great for flavor): Toss cubed vegetables in a thin coat of olive oil, spread on a baking sheet, and roast at 400°F (200°C) until completely soft. Roasting concentrates natural sugars and adds depth that steaming doesn't.
Fruits that need no cooking: Ripe bananas, avocados, mangoes, and papayas can be mashed or blended raw. No heat required.
Step 3: Blend to desired consistency
Transfer cooked produce to your blender or food processor. Blend on high, adding liquid as needed to reach the right texture. For thinning liquid, use:
- Breast milk or formula (adds familiar flavor and nutrients)
- Reserved cooking water from the steamer (contains leached vitamins)
- Plain water (works fine in a pinch)
Start with 1–2 tablespoons of liquid and add more gradually. It's easier to thin a thick puree than to thicken a runny one.

Step 4: Test the texture
Rub a small amount between your fingers. For a 6-month-old just starting solids, the puree should feel completely smooth with no lumps or grains. As your baby progresses, leave more texture — small soft lumps, then mashed, then finely chopped.
Step 5: Serve or store
Serve a portion at room temperature or slightly warm (test on your wrist first). Spoon the remainder into ice cube trays, silicone freezer pods, or small storage containers, and refrigerate or freeze immediately.
10 Easy Homemade Baby Puree Recipes
These recipes are organized from simplest single-ingredient purees (ideal for 6-month-olds just starting solids) to more complex combinations for older babies. Each recipe makes approximately eight 2-ounce servings.
For guidance on which foods to introduce first and how to watch for reactions, see our complete baby food allergy introduction guide.
Recipe 1: Classic Sweet Potato Puree (Stage 1 — 6+ months)
Sweet potato is one of the most popular first foods for good reason: it's naturally sweet, nutrient-dense, and blends to a perfectly smooth consistency.
Ingredients:
- 2 medium sweet potatoes (about 1 lb), peeled and cubed
Method:
- Steam cubed sweet potato for 12–15 minutes until fork-tender.
- Transfer to blender. Add 2–4 tablespoons of breast milk, formula, or cooking water.
- Blend until completely smooth.
Nutrition highlight: Rich in beta-carotene (converts to vitamin A), fiber, and potassium.
Recipe 2: First Pea Puree (Stage 1 — 6+ months)
Ingredients:
- 2 cups frozen peas (no need to thaw)
Method:
- Steam peas for 3–4 minutes until bright green and soft.
- Blend with 3–4 tablespoons of liquid until smooth.
- For extra-smooth results, push through a fine mesh strainer to remove skins.
Nutrition highlight: Excellent source of plant-based protein, iron, and vitamins A, C, and K.
Recipe 3: Silky Avocado Mash (Stage 1 — 6+ months)
Ingredients:
- 1 ripe avocado
Method:
- Halve the avocado and scoop out the flesh.
- Mash with a fork until smooth, adding breast milk or formula to thin as desired.
- Serve immediately — avocado browns quickly once exposed to air.
Nutrition highlight: Packed with healthy monounsaturated fats critical for brain development, plus folate and potassium.
Recipe 4: Simple Banana Puree (Stage 1 — 6+ months)
Ingredients:
- 1 ripe banana (brown spots on the skin indicate peak sweetness and digestibility)
Method:
- Peel and break into chunks.
- Mash with a fork or blend with a splash of breast milk or formula.
Nutrition highlight: Natural prebiotics that support gut health, plus vitamin B6 and potassium.
Recipe 5: Roasted Butternut Squash Puree (Stage 1 — 6+ months)
Ingredients:
- 1 small butternut squash (about 2 lbs), halved and seeded
Method:
- Place squash cut-side down on a parchment-lined baking sheet.
- Roast at 400°F (200°C) for 40–45 minutes until flesh is completely soft.
- Scoop out flesh and blend with 2–4 tablespoons of liquid until smooth.
Nutrition highlight: Exceptionally high in beta-carotene, vitamin C, and manganese.

Recipe 6: Apple and Cinnamon Puree (Stage 1 — 6+ months)
Ingredients:
- 3 medium apples (Gala or Fuji work well), peeled, cored, and diced
- Pinch of cinnamon (optional — introduces a warm flavor note)
Method:
- Steam apple chunks for 8–10 minutes until very soft.
- Blend with cinnamon and a small amount of cooking water until smooth.
Nutrition highlight: Soluble fiber (pectin) supports healthy digestion. Cinnamon adds flavor without sugar.
Recipe 7: Carrot and Ginger Puree (Stage 2 — 7+ months)
Ingredients:
- 4 large carrots, peeled and sliced
- ¼ teaspoon fresh ginger, finely grated
Method:
- Steam carrot slices for 10–12 minutes until completely tender.
- Blend with grated ginger and 2–3 tablespoons of liquid. Blend until smooth or leave slightly chunky for older babies.
Nutrition highlight: Beta-carotene powerhouse. Ginger supports digestion and introduces a new flavor profile.
Recipe 8: Broccoli and Pear Puree (Stage 2 — 7+ months)
Ingredients:
- 1 cup broccoli florets
- 1 ripe pear, peeled, cored, and diced
Method:
- Steam broccoli and pear together for 6–8 minutes.
- Blend with 2 tablespoons of cooking water until desired consistency is reached.
Nutrition highlight: Broccoli delivers iron, calcium, and vitamin C. The pear adds natural sweetness that offsets broccoli's mild bitterness, encouraging acceptance of green vegetables.
Recipe 9: Chicken, Sweet Potato, and Spinach Puree (Stage 2 — 7+ months)
Ingredients:
- 1 small boneless, skinless chicken breast (about 4 oz), diced
- 1 medium sweet potato, peeled and cubed
- 1 cup fresh baby spinach
Method:
- Steam chicken and sweet potato together for 15 minutes until chicken is cooked through (internal temp 165°F/74°C) and sweet potato is soft.
- Add spinach during the last 2 minutes of steaming.
- Blend everything with 4–6 tablespoons of cooking water until smooth.
Nutrition highlight: Complete protein from chicken, iron from spinach, and beta-carotene from sweet potato. This combination delivers heme iron (from chicken) alongside vitamin C (from spinach and sweet potato), which enhances iron absorption.
Recipe 10: Lentil and Vegetable Puree (Stage 2 — 8+ months)
Ingredients:
- ½ cup red lentils, rinsed
- 1 small carrot, peeled and diced
- 1 small zucchini, diced
- 1 cup low-sodium vegetable broth or water
Method:
- Combine lentils, carrot, and broth in a saucepan. Bring to a boil, then reduce heat and simmer for 12 minutes.
- Add zucchini and cook for 5 more minutes until lentils are completely soft and falling apart.
- Blend to desired consistency — red lentils break down naturally, so you may only need a quick pulse.
Nutrition highlight: Outstanding source of plant-based protein, iron, and fiber. Red lentils cook quickly and create a naturally creamy texture that babies love.
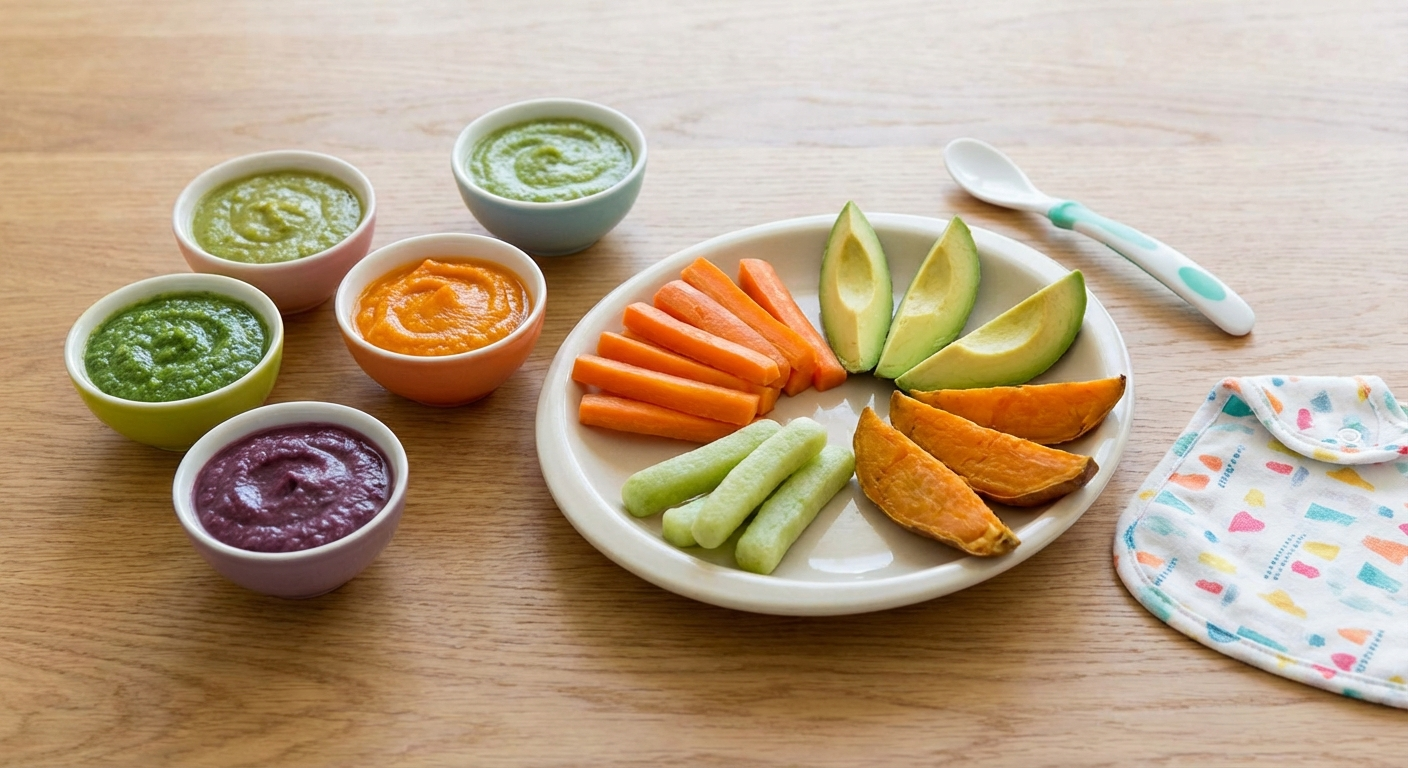
Puree Stages: Textures by Age
Texture progression is just as important as food variety. Moving through stages gradually builds the oral motor skills your baby needs for chewing and eventually eating table food.

Stage 1: Thin, smooth purees (around 6 months)
- Completely smooth, no lumps
- Consistency of thick cream or yogurt
- Thin with breast milk, formula, or cooking water
- Single-ingredient purees allow you to identify any allergic reactions
- Introduce one new food at a time, waiting 2–3 days between new foods
Stage 2: Thicker, combination purees (around 7–8 months)
- Slightly thicker consistency — the puree holds its shape on a spoon
- Small soft lumps are appropriate
- Combine two to three ingredients per puree
- Begin introducing herbs and mild spices (basil, cinnamon, cumin, oregano)
- Offer more variety: proteins, grains, legumes alongside fruits and vegetables
Stage 3: Chunky, mashed textures (around 9–12 months)
- Mashed rather than blended — visible pieces of soft food
- Fork-mashed consistency encourages chewing
- Include soft finger foods alongside purees
- Babies at this stage often enjoy self-feeding with preloaded spoons
Moving through these stages at your baby's pace — not according to a rigid timeline — is key. Some babies are ready for soft lumps at 7 months; others prefer smoother textures until 9 months. Watch your baby's cues rather than the calendar.
If you're interested in introducing finger foods alongside purees, our baby-led weaning starter guide walks through safe first finger foods and how to combine them with spoon-feeding.
How to Store and Freeze Homemade Baby Purees
Batch cooking saves enormous amounts of time. Spend 30–40 minutes on a Sunday making several types of puree, freeze them, and you have ready-to-serve meals all week.

Refrigerator storage
- Store in airtight containers — glass jars or BPA-free plastic containers with tight-fitting lids
- Use within 48 hours of preparation
- Do not store purees that have been in contact with your baby's saliva (the enzymes in saliva accelerate bacterial growth)
- Keep at 40°F (4°C) or below
Freezer storage
- Spoon purees into silicone ice cube trays, silicone freezer pods, or small freezer-safe containers
- Each standard ice cube tray compartment holds approximately 1 ounce (2 tablespoons)
- Once frozen solid (usually 6–8 hours), pop the cubes out and transfer to labeled freezer bags
- Write the food type and date on each bag
- Use within 3 months for best quality and nutrition
- Store at 0°F (-18°C) or below
Thawing and reheating
- Best method: Transfer frozen cubes to the refrigerator the night before. They'll be thawed and ready to warm by morning.
- Quick method: Place frozen cubes in a microwave-safe dish and heat in 15-second intervals, stirring thoroughly between each interval.
- Stovetop method: Warm in a small saucepan over low heat, stirring frequently.
- Always test the temperature on your inner wrist before serving — purees should be lukewarm, not hot.
- Never refreeze previously frozen purees that have been thawed.
Foods that freeze well vs. foods that don't
Freeze well: Sweet potatoes, carrots, peas, squash, apples, pears, bananas (cooked), chicken, lentils, broccoli, spinach
Don't freeze as well: Avocado (browns and separates), raw banana (texture changes), yogurt-based purees (separates on thawing)
Safety Tips for Homemade Baby Food
Homemade baby food is safe when you follow basic food-safety practices. These guidelines are recommended by the USDA and the American Academy of Pediatrics.
Hygiene essentials
- Wash hands with soap and warm water for at least 20 seconds before preparing food
- Clean all equipment, cutting boards, and surfaces before and after use
- Use separate cutting boards for raw meat and produce
- Wash all fruits and vegetables under running water, even if you plan to peel them
Cooking temperatures
- Cook all meats to a minimum internal temperature of 165°F (74°C)
- Cook eggs until both whites and yolks are firm
- Fish should reach 145°F (63°C) and flake easily with a fork
Foods to avoid before 12 months
- Honey: Risk of infant botulism. Do not add honey to any puree for babies under 1 year.
- Cow's milk as a drink: Can be used in small amounts for cooking, but should not replace breast milk or formula as a primary drink until 12 months.
- Added salt and sugar: Babies' kidneys cannot handle excess sodium. Their taste preferences are still forming — they don't need added sweetness.
- Whole nuts and nut butters by the spoonful: Choking hazard. Thin nut butters with breast milk and mix into purees instead. Introducing peanut and tree nut proteins early (as smooth puree mix-ins) is now recommended to reduce allergy risk.
- Low-fat or diet products: Babies need full-fat options for brain development.
Nitrate concerns
Root vegetables like beets, carrots, spinach, and green beans can contain higher levels of naturally occurring nitrates, which in rare cases can cause methemoglobinemia in very young infants. The AAP notes that this risk is extremely low with commercially grown produce in the US, but recommends:
- Avoid homemade beet, spinach, and turnip purees before 6 months of age
- Use fresh or commercially frozen produce (which is tested for nitrate levels)
- Don't store these purees at room temperature for extended periods, as bacteria can convert nitrates to nitrites
Parents who are breastfeeding may also want to consider their own nutritional needs during this time. For guidance on maintaining your own diet, see this helpful resource on postpartum nutrition while breastfeeding.
Introducing Allergens Through Purees
Current guidelines from the AAP, AAAI, and LEAP study data are clear: early introduction of common allergens (starting around 6 months, or as early as 4 months for high-risk infants) reduces the risk of developing food allergies. Purees are an excellent vehicle for allergen introduction.

The top allergens and how to introduce them in purees
- Peanut: Mix ½ teaspoon of smooth peanut butter into 2–3 tablespoons of a familiar puree. Stir until fully incorporated with no lumps.
- Egg: Hard-boil an egg, mash the yolk and white together, and blend into a vegetable puree.
- Dairy: Stir plain full-fat yogurt into a fruit puree, or add a small amount of ricotta cheese.
- Wheat: Cook iron-fortified infant oat or wheat cereal and mix with a fruit or vegetable puree.
- Tree nuts: Mix ½ teaspoon of smooth almond butter or cashew butter into a puree.
- Fish: Steam and finely puree mild white fish (like cod or sole) and blend with sweet potato or squash.
- Soy: Blend soft tofu into a vegetable puree.
The introduction protocol
- Introduce one new allergen at a time.
- Offer a small amount (about ½ teaspoon mixed into a familiar puree).
- Wait and observe for at least 2 hours after the first exposure.
- Watch for signs of allergic reaction: hives, vomiting, swelling of the lips or face, difficulty breathing.
- If no reaction occurs, continue offering that allergen regularly (2–3 times per week) to maintain tolerance.
- Wait 2–3 days before introducing the next new allergen.
For a comprehensive walkthrough with specific timelines and high-risk baby protocols, see our full baby food allergy introduction guide.
FAQs### What age can I start giving my baby homemade purees?
Most pediatric guidelines recommend starting solids around 6 months of age. Your baby should be able to sit upright with minimal support, show interest in food, have good head and neck control, and have lost the tongue-thrust reflex (which pushes food out of the mouth). Always confirm readiness with your pediatrician before starting.
How long do homemade baby purees last in the fridge?
Freshly made purees keep in the refrigerator for up to 48 hours in airtight containers. For longer storage, freeze individual portions in ice cube trays or silicone pods, then transfer to labeled freezer bags. Frozen purees maintain quality for up to 3 months at 0°F (-18°C).
Can I use frozen fruits and vegetables for baby purees?
Absolutely. Frozen produce is flash-frozen at peak ripeness and often retains more nutrients than fresh produce that has been stored for several days. Choose plain frozen options without added salt, sugar, or sauces. No need to thaw before steaming — cook directly from frozen.
Do I need a special baby food maker or can I use a regular blender?
A dedicated baby food maker is convenient but not necessary. A regular blender, immersion blender, food processor, or even a fork and potato masher will work. The advantage of a dedicated maker like the BEABA Babycook Neo is that it steams and blends in one unit, reducing dishes and hands-on time.
How do I thicken or thin homemade baby purees?
To thin: add breast milk, formula, or reserved cooking water a tablespoon at a time. To thicken: stir in iron-fortified infant cereal, mashed avocado, mashed banana, or a starchy puree like sweet potato. Adjust gradually — small additions make a noticeable difference.
Is it safe to reheat frozen baby purees in the microwave?
Yes. Transfer the frozen portion to a microwave-safe dish and heat in 15-second intervals, stirring thoroughly between each interval to eliminate hot spots. Always test the temperature on your inner wrist before serving — the puree should feel lukewarm, not hot. Alternatively, thaw overnight in the fridge and warm gently on the stovetop.
Sources
-
American Academy of Pediatrics. (2025). Starting Solid Foods. HealthyChildren.org. Retrieved from https://www.healthychildren.org/English/ages-stages/baby/feeding-nutrition/Pages/Starting-Solid-Foods.aspx
-
Du Toit, G., et al. (2015). Randomized trial of peanut consumption in infants at risk for peanut allergy (LEAP Study). New England Journal of Medicine, 372(9), 803–813. https://doi.org/10.1056/NEJMoa1414850
-
Barends, C., et al. (2024). Effects of early flavor variety on vegetable acceptance at 18 months. Journal of the Academy of Nutrition and Dietetics, 124(3), 412–421.
-
Bouzari, A., Holstege, D., & Barrett, D.M. (2015). Vitamin retention in eight fruits and vegetables: A comparison of refrigerated and frozen storage. Journal of Agricultural and Food Chemistry, 63(3), 957–962. https://doi.org/10.1021/jf5058793
-
U.S. Department of Agriculture. (2025). Infant Nutrition and Feeding Guide. FNS-USDA. Retrieved from https://wicworks.fns.usda.gov/resources/infant-nutrition-and-feeding-guide
-
Greer, F.R., et al. (2019). The Effects of Early Nutritional Interventions on the Development of Atopic Disease in Infants and Children. Pediatrics, 143(4), e20190281. https://doi.org/10.1542/peds.2019-0281
About the Author
Dr. Emma Wilson, RD, LD is a registered dietitian specializing in pediatric nutrition and infant feeding. She holds a doctorate in clinical nutrition from Tufts University and completed her pediatric dietetics residency at Boston Children's Hospital. Dr. Wilson has spent over 12 years helping families navigate the transition to solid foods, with a focus on evidence-based feeding practices, allergen introduction, and homemade baby food preparation. She serves as a consultant for several pediatric practices and contributes regularly to peer-reviewed nutrition journals. When she's not in clinic, she's test-cooking new baby food recipes in her own kitchen with her two young children as willing taste-testers.
Last reviewed and updated: March 23, 2026