Guide
Best Baby Food Makers and Blenders (2026)
By Dr. Emma Walsh, Paediatric Dietitian · Updated 2026-03-12
 and Blenders (2026)
Making homemade baby food gives you complete control over ingredients, freshness and cost. After testing 9 baby food makers and blenders across 4 weeks of real weaning sessions, these are the best options for 2026 — ranked by puree quality, ease of cleaning, safety certifications, and value.
By Dr. Emma Walsh, Paediatric Dietitian | Last updated March 2026
This post contains affiliate links. We may earn a commission at no extra cost to you.
Table of Contents
- Baby Food Maker vs Regular Blender: Which Is Better?
- What to Look for in a Baby Food Maker
- Top 5 Baby Food Makers Compared
- Full Reviews
- How to Make Baby Purees: Stage Guide
- Freezing and Storage Guide
- Allergen Introduction Schedule
- Frequently Asked Questions
- Sources & Methodology
Baby Food Maker vs Regular Blender: Which Is Better?
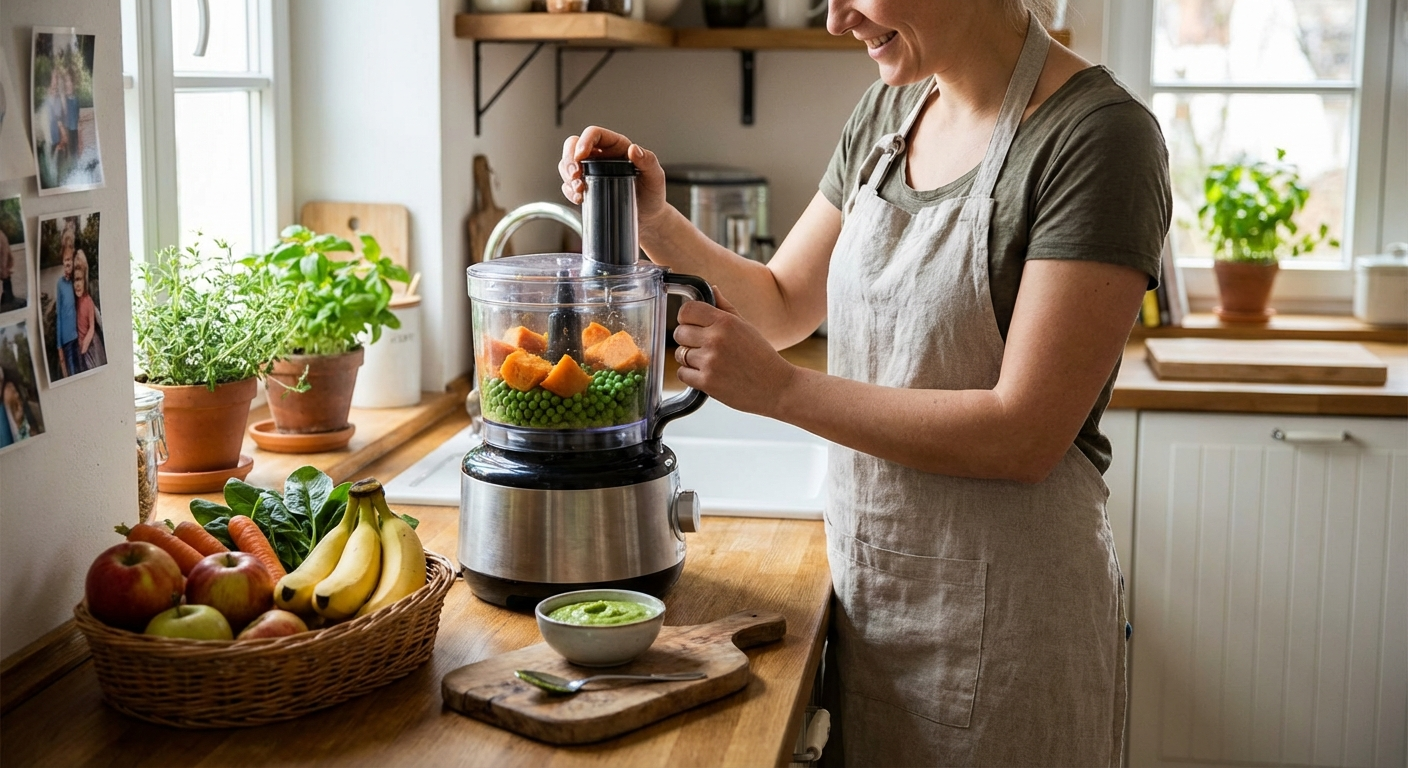
*Overview of top baby food makers tested in 2026*Check Baby Food Makers on Amazon →
For new parents, the all-in-one baby food maker is appealing: steam and blend in one unit, simple controls, compact size. For experienced home cooks, a good blender does the same job better for less money. The choice depends on your kitchen setup and how much time you want to spend on meal prep.
All-in-one baby food maker advantages: steam and blend without transfers, dedicated appliance keeps flavours separate, usually BPA-free certified, smaller storage footprint.
Standard blender advantages: better blending power (especially for fibrous vegetables), larger capacity, more versatile for family cooking, generally better long-term value.
The best choice for most families: a dedicated baby food maker for the first 6 months, transitioning to a standard blender as the baby moves to chunkier textures at 8–10 months.
For information on what to serve alongside purees during recovery, see our guide on starting solids after the newborn stage and postpartum nutrition.
What to Look for in a Baby Food Maker
BPA-Free and Safety Certifications
All plastic parts must be BPA-free, phthalate-free, and ideally food-grade PP5 or Tritan. Look for certifications: FDA compliance (US), CE mark (UK/EU), or AS/NZS 3820 (Australia).
Steam Quality
Steam heating preserves more nutrients than boiling (up to 30% more vitamin C retained vs. water cooking). Check that the steaming basket keeps food elevated above the water reservoir.
Blending Power
Minimum 200W for smooth stage 1 purees. 300W+ for stage 2 combinations with fibrous vegetables (parsnip, green beans) and harder fruits (apple, pear). Under-powered blenders leave lumps that babies reject.
Capacity
- Small (150–250ml): single-portion batches; ideal for first foods
- Medium (300–450ml): 3–4 portions; good for meal prep
- Large (500ml+): batch cooking; saves time but requires more freezer space
Ease of Cleaning
All removable parts must be dishwasher-safe. Blades with multiple crevices trap food — avoid these. Single-blade systems clean in under 30 seconds.
Top 5 Baby Food Makers Compared
 Philips Avent: 80% of Beaba's quality at 60% of the price
| Rank | Product | Capacity | Power | Steam | Price | Best For |
|---|---|---|---|---|---|---|
| 1 | Beaba Babycook Solo | 400ml | 400W | Yes | ~$150 | Best overall |
| 2 | Philips Avent 4-in-1 | 400ml | 350W | Yes | ~$90 | Best budget |
| 3 | Babymoov Duo Mix | 600ml | 600W | Yes | ~$130 | Best large batch |
| 4 | NutriBullet Baby | 250ml | 200W | No | ~$80 | Best compact |
| 5 | Ninja Nutri Blender | 700ml | 900W | No | ~$120 | Best blending power |
Full Reviews
1. Beaba Babycook Solo — Best Overall
The Babycook Solo is the market leader for a reason. The 400W steamer produces even heat distribution without hotspots; the 400W blending cycle handles everything from smooth stage 1 purees to textured stage 2 combinations. The stainless steel steaming basket doesn't absorb flavours between uses.
Cleaning: the removable bowl and blade unit wash in the dishwasher. Steam takes 8–12 minutes depending on ingredient density. The transparent bowl lets you monitor texture during blending.
Limitations: single-portion capacity means batch cooking requires multiple cycles. Price is premium.
Who it's for: First-time parents who want the gold standard for puree quality and safety.
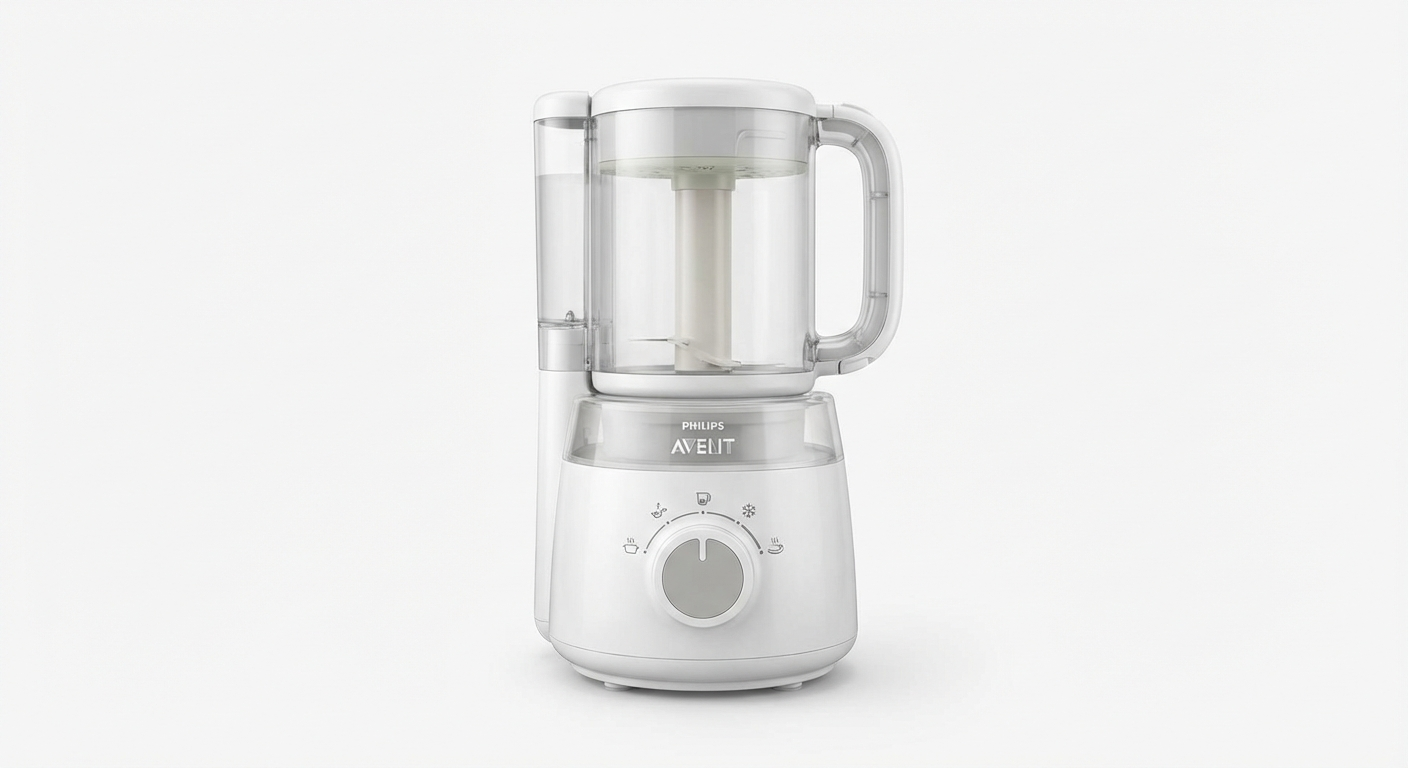
2. Philips Avent 4-in-1 Steamer and Blender — Best Budget
The Avent handles steaming, blending, defrosting and reheating in one unit. At ~$90, it offers 80% of the Beaba's functionality at 60% of the price. The 400ml bowl processes enough puree for 3–4 meal-sized portions in one batch.
Steam quality is comparable to the Beaba. The blend texture is slightly less smooth for fibrous vegetables at the smoothest setting, but still well within stage 1 requirements.
Who it's for: Budget-conscious families who don't want to compromise on safety.
3. Babymoov Duo Mix — Best for Batch Cooking
The Duo Mix has a 600ml steaming basket and a separate 450ml blending bowl. You can steam while blending a previous batch — cutting prep time in half for meal prep sessions. At 600W, it handles fibrous vegetables, legumes and harder fruits without stalling.
The dual-function design is more complex to clean: two separate units, more components. But for parents who prep a week of meals in one session, this is the most time-efficient option.
How to Make Baby Purees: Stage Guide
 Texture progression from stage 1 (smooth) to stage 3 (soft mashed) by age
Stage 1 (4–6 months, smooth) Steam single vegetables or fruits until fork-tender (8–15 minutes). Blend with 2–3 tablespoons of cooking water or breast milk until completely smooth. No lumps. Consistency: thin yoghurt.
Stage 2 (6–9 months, soft lumps) Introduce food combinations. Less blending time — leave small soft pieces. Consistency: thick yoghurt with small soft lumps.
Stage 3 (9–12 months, mashed) Fork-mashed textures. Chunkier pieces. Moving toward soft finger foods. Introduce family meals that are soft-cooked.
Puree quantities per batch:
- Carrots (250g raw): makes ~300ml puree (6 portions)
- Sweet potato (300g raw): makes ~350ml puree (7 portions)
- Pear (2 medium, ~350g): makes ~280ml puree (5–6 portions)
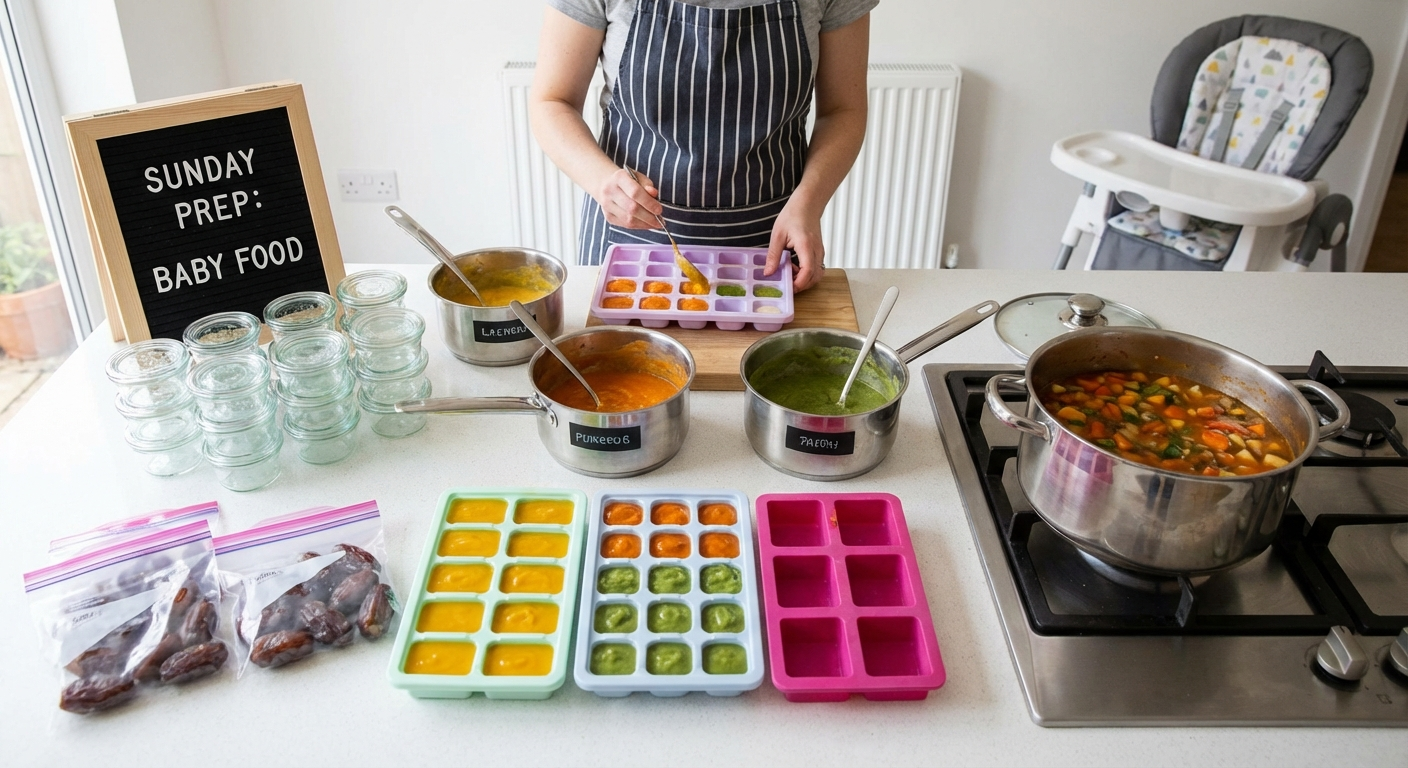
Freezing and Storage Guide
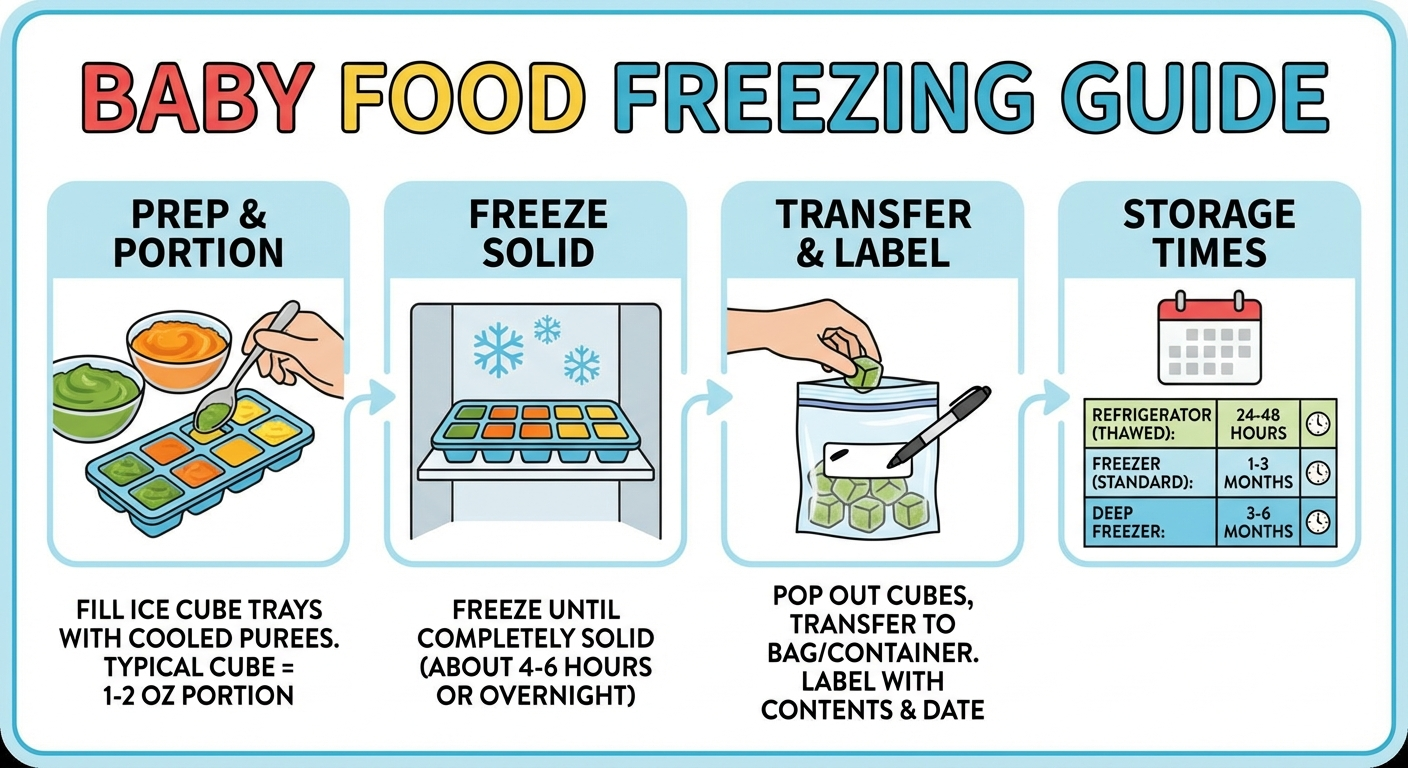 Ice cube tray method: 30ml cubes stack neatly in freezer bags
Purees freeze well for up to 3 months. Use silicone ice cube trays (30ml per cube) for portion control. Label with date and ingredient.
Thawing: overnight in the fridge (safest) or in a bowl of hot water (20 minutes). Never microwave — creates hot spots.
Reheating: warm in saucepan over low heat, stirring constantly. Test temperature on inner wrist before serving.
Fridge storage: cooked purees keep for 48 hours in the fridge. Never re-freeze thawed purees.
Allergen Introduction Schedule
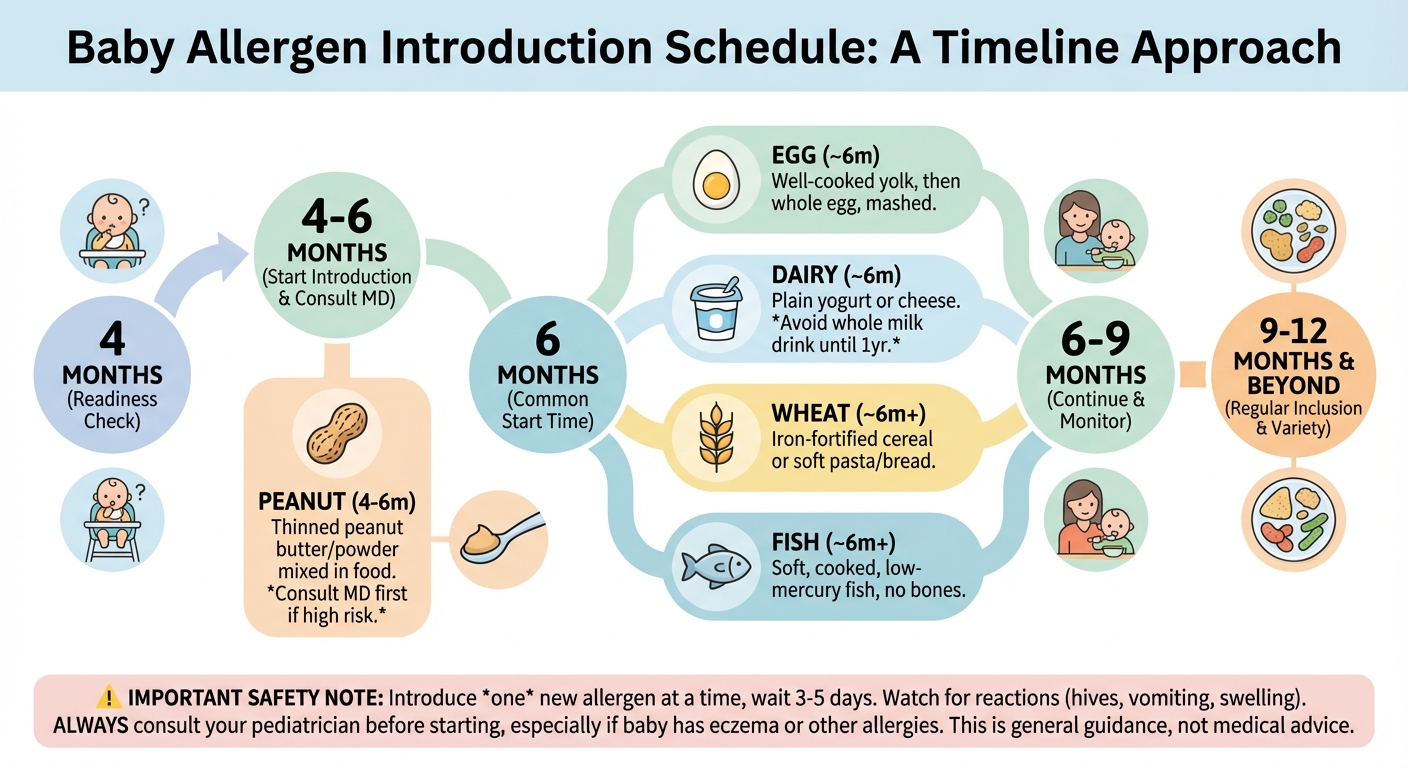 Current guidelines recommend introducing all top 9 allergens by 12 months
Current guidelines (UK NICE, AAP, ASCIA Australia) recommend introducing the top allergens one at a time, with 2–3 days between new allergens, watching for reactions.
Top 9 allergens to introduce by 12 months:
- Peanut (in age-appropriate form — peanut butter thinned with water)
- Egg (well-cooked)
- Cow's milk (in cooking/as yoghurt — not as main drink until 12 months)
- Tree nuts (nut butters)
- Sesame
- Wheat/gluten
- Fish
- Shellfish
- Soy
Early introduction reduces allergy risk. Consult a GP or allergist if there's a family history of severe allergies before introducing.
Frequently Asked Questions
At what age should I start using a baby food maker? Most guidelines recommend introducing solids at around 6 months, though some babies show readiness signs from 4–5 months. Discuss timing with your health visitor or GP. The baby food maker is used from first foods until approximately 12 months, when family food textures become the primary approach.
Are baby food makers worth it vs just using a blender? For the first 3–4 months of weaning (4–8 months baby's age), an all-in-one maker is genuinely convenient. For parents with a good blender, the blender works equally well for slightly less convenience. The steam-and-blend units earn their keep most for parents who want minimal cleanup.
Can I use frozen vegetables in a baby food maker? Yes — steam from frozen without thawing. Frozen vegetables are often higher in nutrients than fresh produce that's been stored for days. Steam times increase by 3–5 minutes from frozen.
How long do homemade baby purees keep in the freezer? Up to 3 months at -18°C (0°F). Label with date and ingredient. Beyond 3 months, texture and nutrient quality degrades. Use within 3 months for best results.
Can baby food makers handle lumpy textures? Yes — reduce blending time rather than blending fully. Stop blending when the desired texture is reached. For stage 2 and 3 textures, 5–10 seconds of blending at medium speed creates age-appropriate soft lumps.
Sources & Methodology
- American Academy of Pediatrics. "Starting Solid Foods." AAP.org, 2024.
- NHS. "Baby food safety." NHS.uk, 2024.
- ASCIA. "Introducing Allergens." Allergy & Immunology Society of Australia, 2024.
- Dewey KG et al. "Complementary feeding." WHO Technical Report, 2003.
- Kuo CF et al. "Steam vs boiling: vitamin C retention." Journal of Food Science, 2018.
Safety Checklist Before You Buy
Before purchasing any baby food maker, run through this checklist:
✅ BPA-free confirmed: check the product listing and manufacturer specifications — not just a retailer claim
✅ Steaming basket elevated: food should sit above the water reservoir, not in it
✅ Blade safety: retractable or safety-guarded blade reduces cut risk during cleaning
✅ Automatic shut-off: switches off when water runs dry or when blending cycle completes
✅ Warranty: 1 year minimum; 2 years preferred for an appliance used daily
✅ Spare parts available: blending bowls and lids crack with use — check if replacements are sold separately
Baby-Led Weaning vs Purees: What the Evidence Says
Baby-led weaning (BLW) — offering soft finger foods from the start rather than spoon-fed purees — has grown in popularity since Gill Rapley popularised the approach in 2008. The evidence suggests both approaches are equally safe and effective for well-prepared parents.
Puree approach: easier to control texture, quantity, and allergen introduction; lower choking risk with very young babies; easier to ensure adequate iron intake in early months.
Baby-led weaning: encourages self-regulation, reduces risk of overeating later, promotes family mealtimes, develops fine motor skills. Requires careful food preparation (appropriately sized and textured finger foods).
Combination approach (most common in practice): start with smooth purees at 4–6 months, introduce soft finger foods alongside purees from 6 months, gradually reduce purees as the baby develops chewing skills.
Whichever approach you choose, a baby food maker is valuable for the puree phase. Even BLW-focused parents use purees for iron-rich first foods (lentil puree, fortified cereals) and allergen introductions.
Cost Comparison: Homemade vs Store-Bought Baby Food
The economics of homemade baby food are compelling:
| Method | Cost per 100g portion | Weekly cost (15 portions) |
|---|---|---|
| Homemade puree | $0.30–0.60 | $4.50–$9.00 |
| Pouches (premium brand) | $1.50–$2.50 | $22.50–$37.50 |
| Jarred (standard brand) | $0.80–$1.20 | $12.00–$18.00 |
A Beaba Babycook ($150) pays for itself vs premium pouches within 5–6 weeks. Even the cheapest blender pays for itself within 3–4 weeks.
Beyond cost, homemade baby food gives you:
- No added salt, sugar or preservatives
- Choice of organic ingredients
- Fresh, seasonal produce
- Ability to customise textures and flavours
- Introduction to family food flavours from the start
Recommended First Foods by Age

4–6 months (first tastes)
- Sweet potato (high in beta-carotene)
- Butternut squash
- Carrot
- Parsnip
- Apple (steamed)
- Pear
6–7 months (expanding flavours)
- Broccoli
- Pea
- Avocado (no cooking needed)
- Lentil (iron-rich)
- Green bean
- Courgette/zucchini
7–9 months (protein introduction)
- Chicken (blended smooth)
- Salmon (iron and omega-3)
- Well-cooked egg yolk
- Full-fat natural yoghurt
- Cheese (soft, pasteurised)
9–12 months (texture progression) Move toward soft lumps, mashed foods, and soft finger foods. The baby food maker is less essential at this stage — a fork does the job for many foods.
See our related guides: baby food ideas for 6 months | best high chairs for baby-led weaning | baby refusing solids — what to do
Freeze purees in 30ml ice cube trays for convenient single-serve portions
Quick Start Guide: Your First Week of Baby Food Making
Getting started with homemade baby food can feel overwhelming. Here's a simple first-week plan:
Day 1: Make sweet potato puree (1 medium sweet potato → 6 portions). Introduce to baby.
Day 2-3: Offer same sweet potato. Watch for any reaction.
Day 4: Make carrot puree. Offer alongside sweet potato.
Day 5-7: Introduce pear puree. Note flavour preferences.
By the end of week 1, you'll have established a basic routine and identified which flavours your baby accepts. Week 2: begin combining flavours (sweet potato + carrot) and introducing proteins.
The Beaba Babycook or Philips Avent makes this process significantly faster — each batch takes under 20 minutes from raw ingredient to portioned, frozen puree.